I think we lose something when we buy the packaged loafs from supermarkets. The amount of bread our household wastes by throwing it out when we buy pre-packaged loafs is amazing, however make your own and there is little or no waste - because you have made it and spent a bit of time looking after it - I think you care about it more so there is less waste. There is nothing more satisfying and pleasurable to making and eating your own fresh bread.
People say they do not have time, but they have time to spend hours in front of the television, so lets combine the two. Can you spend 30 minutes to watch a soap opera, then you can spend 30 minutes effort to make a lovely fresh bread loaf. The most amount of effort from a person making bread is 20 minutes of kneading, then bread itself then does all the hard work.
The benefits of making your own bread:
- You know what goes into it - basic ingredients - no shelf life prolonging ingredients
- You will use it - because you have made it and spent time caring for it
- It tastes better - especially toasted with loads of butter
- There is less plastic packaging so it is better for the environment
Supermarkets know that the smell of bread is unique so they tend to have open bakeries that let the smell of baking bread waft across the store to tempt you, so why not create your own happiness in your own home. Bread making is not complex, it is simple - we have been doing it for thousands of years, so dive in and create your own loaf of happiness. If you do not have a loaf tin then so what - just put the dough on a tray when you are ready to put it in the oven and end up with a round loaf rather than a square loaf.
So tips on making bread:
- Ignore the recipe on the packet, it usually leads to a heavy bread
- Use strong bread flour
- Spend a little extra on some decent flour and which is not mixed with other ingredients (perhaps to thin it out to make it cheaper)
- Do not let the bread to over rise, there is a thing called oven bounce, which is what pushes your bread up, this is where the yeast organisms munch away and create air bubbles as the temperature in the oven heats the dough and hence make the bread rise
- Pre-heat the oven and when you put the bread in don't slam the door shut, and don't open it to see how it is getting on until it is ready
- Kneading is the key - do not skip this or cut down on the time - 15 minutes of hand kneading is what you are aiming for the first kneading
- Let your dried yeast develop before adding it
- Most recipes say leave the dough to rise in a warm place, actually, if your house is 18 - 21 degree centigrade that is OK
- Be patient
- Finally - just enjoy making it and eating it
Costs:
500g of flour - 20p
Yeast - 8p
Other ingredient approx - 2p
Total cost - 30p
As the price of bread varies differently at Tesco's, I will only show what a loaf of bread costs to make, rather than comparing.
Ingredients:
500g of strong white bread flour
1 1/2 TSP of Salt
1 TSP of sugar
7g of dried yeast
15g of soft butter
300 ML of luke warm water
Flour for dusting

Step 1 - Get the yeast going
- Take a measuring, measure 200 ML of cold water and from a boiled kettle top up to 300 ML with hot water, and stir
- Open the dried yeast and add it to the water, give it a little stir into the water and set aside for 10 minutes.
OK - so why are we doing this, the packet says it is ready to use. By doing this you can see if the yeast is active, so you do not waste your flour and your time if the yeast is inactive, all you have lost is the dead yeast
Adding the yeast to the water

The yeast bubbling after 10 minutes

Step 2 - Make the dough
- Whilst waiting the yeast to activate, add the flour, salt, sugar and butter to a bowl
- Rub with your fingers the butter into the flour
- When the yeast is active, add the water and yeast to the bowl (See picture below)

- With a knife start to combine the flour, water and yeast (see image below)

- Pull the dough together, and lightly flour the work surface, tip the dough out and gently start to fold it over itself and begin kneading the dough. I knead the dough for 15 minutes.
The dough initially turned out

The dough after 15 minutes of kneading

Step 3 - Letting the dough rise
- Place the dough back into the bowl
- Lightly oil some cling film and place it over the bowl and leave for 45 minutes
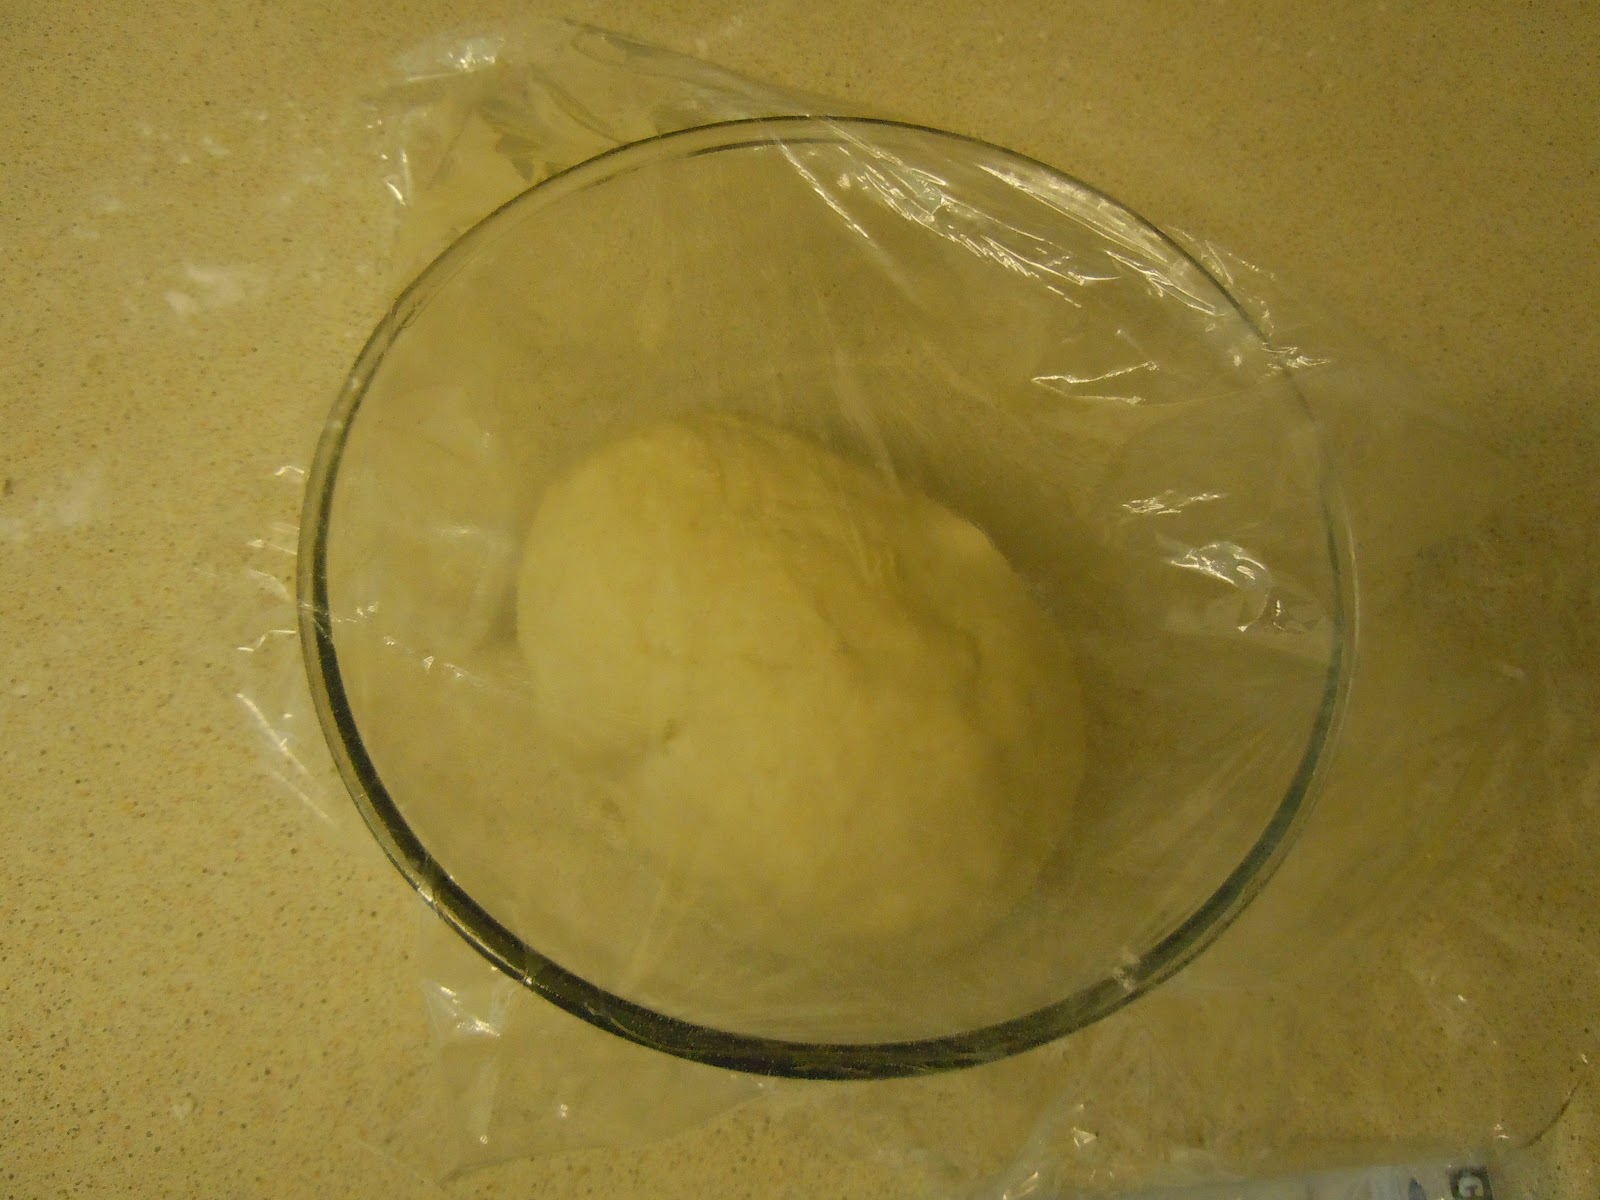
- The dough will rise, and this is what you should have

- Lightly grease the loaf tin with butter
- Then take your dough and push it back down in the bowl (See image below)

- Turn the dough out on to a lightly floured surface and knead again for 5 minutes
- Place it in to the loaf tin and cover again with the cling film

- turn the oven on - set to 230 degrees C
- Leave the bread to rise once again - you are not looking for the loaf to rise high above the tin, as thanks to oven bounce, that will push the dough up. Below is what you are looking to achieve at this step

- Once the above stage is achieved, usually about 30 minutes, place it in the oven
- After 15 minutes, turn the oven down to 200 Degree C and cook for another 20 Minutes
- After cooking turn out on a wire rack and leave to cool
Here is the finished bread

No comments:
Post a Comment